Home > Studio Recording DIY Projects> KRK RP8 Electronics
KRK RP8 Autopsy
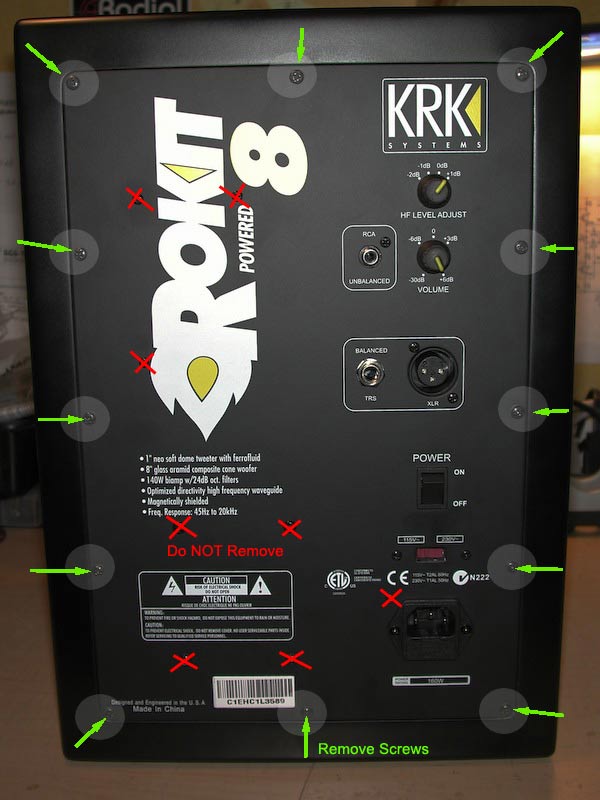
The KRK RP8 monitor's back has several screws. First, we need to remove the screws holding the back plate to the speaker box. Remove all screws marked with the GREEN Arrows.
DO NOT, I repeat, DO NOT remove the screws marked with the RED X. The four screws around the "Caution" label is for the power transformer, and the 3 screws around the ROKIT label holds the heatsinks and PCB for the amplifier board.
After you've removed all screws, you'll find out that the back plate is still attached to the speaker box. This baffled (pardon the pun) me and I began to suspect that maybe the back is glued ot the wooden box, or there is a locking mechanism, or I need to remove more screws...
After fiddling around and trying to tap around the monitor with my hand (closed fist), the back plate finally got loose!
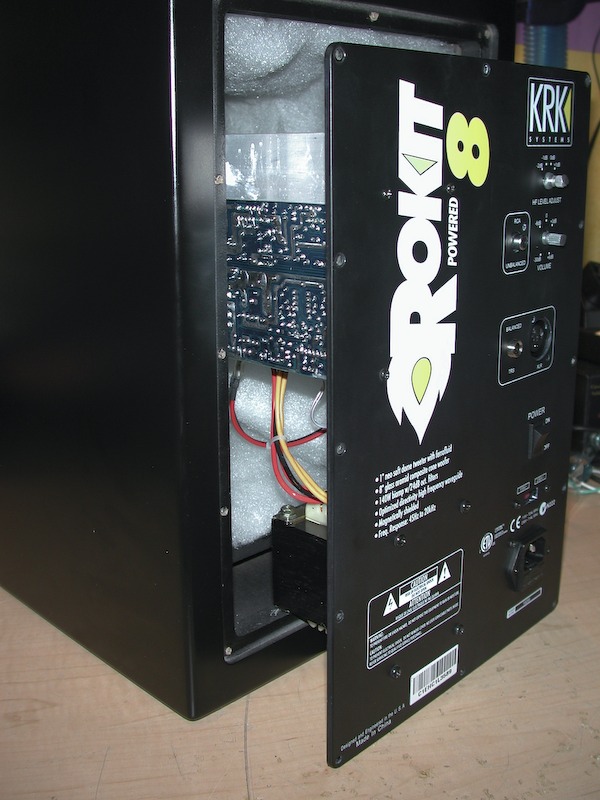
This is a shot of the opened RP8! Woohoo!!!
The perimeter edges of the back plate has some sort of rubber lining, and I think this assures an air-tight seal around the plate. So it may take some coaxing and work to pry it loose.
Okay, are you ready to peak and see what's inside the RP8 Active Monitor?
Next Step... Inside the RP8 Active Monitor
.