Home > Studio Recording DIY Projects> KRK RP8 Electronics
KRK RP8 Autopsy
What's inside the RP8 active monitor??? Take a look for yourself.
You can see sound dampening material stuffing around the box (the white padding material). It's not attached or glued to the sidewalls... it's just lining it around loosely.
You'll see 3 pairs of wires connected and coming out of the box.
1. The white and red pair are the wires that connects to the Yellow LED. When the RP8 is powered on, you'll see a yellow light in the front of your monitor's ROKIT label. (I guess you can mod this and replace the Yellow LED with something else... like WHITE, or BLUE LED, or make it glow as if it's alive like those Apple Computer White LED indicators.)
2. A set of Black and Red wires with a tag sticker "LF" for the Low Frequency Driver (i.e. the yellow cone woofer).
3. Another set of Black and Red wires with an "HF" tag for the High Frequency Driver (i.e. the black domed tweeter).

Here are some close-up shots. These are the LF wires... connected to the woofer speaker.
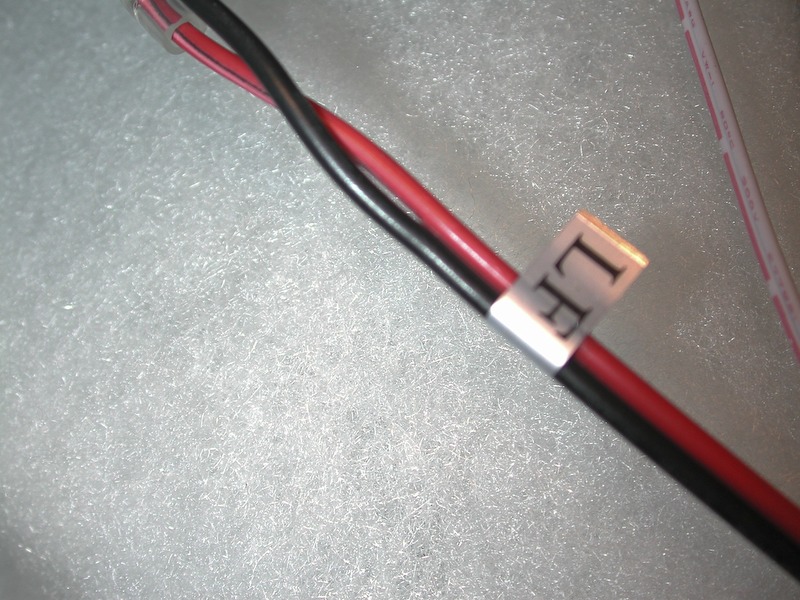
And these are the "HF" wires connected to the Tweeter speakers.
The Blue PCB on the left is where the XLR and TRS jacks are attached. This is connected to the bigger PCB (pictured on the right) via shielded cable. The bigger PCB on the right is the "Active Filter" board.
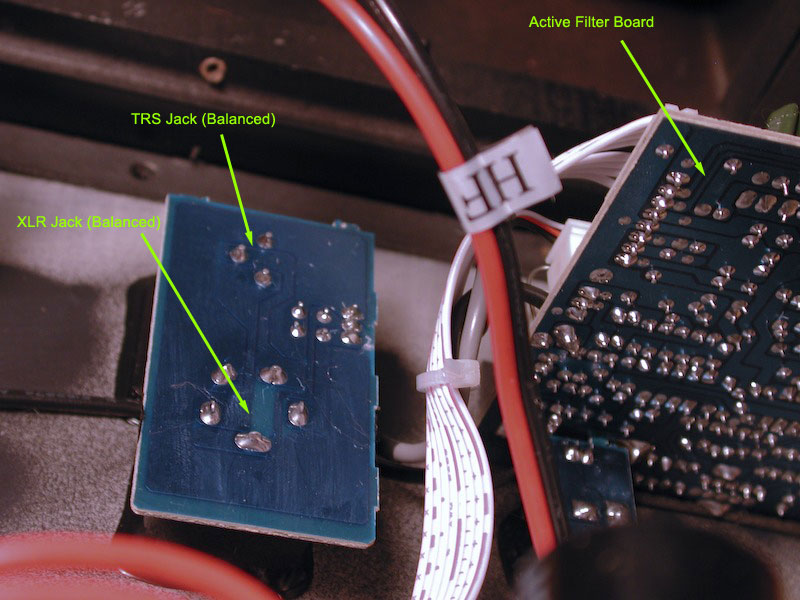
Note that the TRS jack and XLR jacks are just connected in parallel to each other. So there is no advantage/disadvantage using one over the other. i.e. don't think that XLR connections to the RP8 will sound better than TRS connections. They're the same.
Next Step... AC Power for RP8 Active Monitor
.